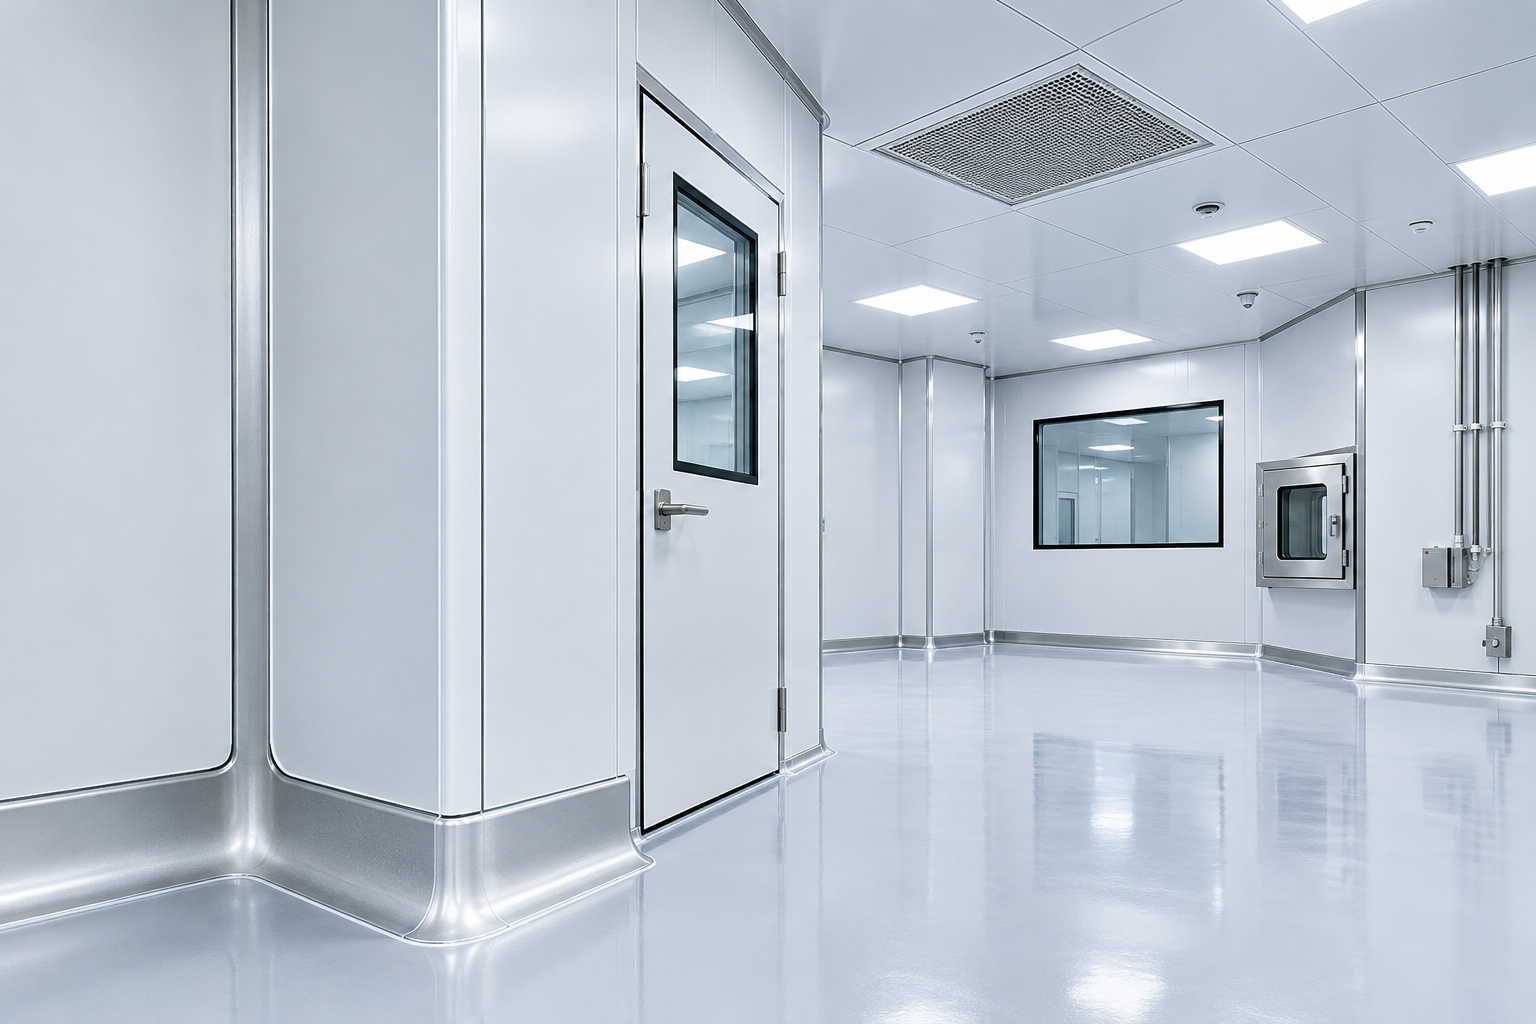
A cleanroom can be designed perfectly on paper and still fail validation because of a few millimetres of unsealed gap. In most failed projects, the HVAC is not the problem. The envelope is.
Cleanroom panel installation decides whether your room can hold pressure, resist contamination, and pass qualification. This guide covers how joints, sealing and cove profiles should be done, where leakage typically hides, and how to avoid failing validation.
Key Takeaways
- Cleanroom panels are only as airtight as their joints, penetrations and wall-to-floor and wall-to-ceiling junctions.
- Cove profiles remove the 90° corners where particles and microbes collect, and make cleaning and disinfection effective.
- Leakage causes pressure cascade loss, particle count excursions and recovery-time failures during validation.
- Most leakage is found at panel joints, door frames, service penetrations, ceiling grid interfaces and light fittings, not in the panel faces.
- Finding leaks before qualification is far cheaper than finding them during it.
1. Why the Cleanroom Envelope Matters
A cleanroom works by supplying filtered air and holding a controlled pressure difference against adjacent areas. This pressure cascade only holds if the room is sufficiently airtight.
- Leakage in (negative-pressure paths) brings in unfiltered air, particles and microorganisms.
- Leakage out (positive-pressure paths) wastes conditioned air, makes pressure hard to control, and can compromise containment in hazardous or potent-compound areas.
Guidance such as ISO 14644 and EU GMP Annex 1 expects a cleanroom to maintain its classification, pressure differentials and recovery performance. The envelope is what makes that possible, which is why regulators and auditors look closely at it.
2. Cleanroom Panel Joints: Where Quality Is Won or Lost
Modular cleanroom panels (typically PUF, PIR, rockwool or aluminium honeycomb core with PPGI, powder-coated or stainless steel skins) are joined using tongue-and-groove, cam-lock or aluminium H-section systems. Whatever the system, the joint is the weakest point.
Good joint practice
- Flat, plumb and aligned panels. A misaligned panel opens a gap no sealant can reliably bridge. Check verticality and flushness as you go, not at the end.
- Dimensionally accurate base setup. Floor channel or base track must be level and square before any panel goes up. Errors compound across a wall.
- Gasketed or factory-sealed joint profiles where the system provides them.
- Tight, flush panel-to-panel interfaces with a consistent joint width.
- Secure mechanical fixing so panels cannot shift or flex after sealing.
Common joint mistakes
- Forcing out-of-square panels together
- Uneven joint gaps along the panel height
- Skipping gaskets or damaging them during assembly
- Joints that were sealed before final alignment, which then crack when panels settle
3. Sealing: The Step That Makes It Airtight
Even well-aligned joints need sealing. In cleanrooms, sealing serves three purposes: airtightness, a smooth cleanable surface, and prevention of particle and moisture ingress into the panel core.
Sealant selection
- Use a cleanroom-grade, non-shedding silicone or equivalent sealant suitable for the environment.
- Confirm compatibility with the cleaning and disinfecting agents used in the room, including sporicidal agents and VHP where applicable.
- Select anti-fungal, low-outgassing products for pharmaceutical and sterile areas.
- Do not use general building sealants, which can shed, degrade, discolour or support microbial growth.
Sealing best practice
- Clean and dry joint surfaces and remove dust and oils.
- Apply backing material or masking where needed for a controlled bead.
- Apply the sealant in a continuous bead with no starts, stops or voids.
- Tool it to a smooth, concave, flush finish.
- Remove masking before the sealant skins.
- Allow the full cure time before testing.
Where sealing is commonly missed
- Behind and around door frames
- Around light fittings and ceiling-mounted devices
- Around pass boxes, windows and vision panels
- At the top of walls where they meet the ceiling grid
- At cable, pipe and duct penetrations
4. Cove Profiles: Why Corners Must Be Rounded
A 90° internal corner is a particle trap. It is hard to clean, collects residue and gives microorganisms a place to survive.
Cove profiles replace sharp corners with a smooth radius where:
- wall meets wall
- wall meets floor
- wall meets ceiling
Benefits
- Easier, more effective cleaning and disinfection
- No ledges or crevices for particles to accumulate
- Better airflow near surfaces
- A neater, more durable, sealable junction
- Alignment with the hygienic design expected in GMP environments
Cove best practice
- Choose an appropriate radius for the application. Many pharmaceutical specifications call for a generous, easy-to-clean radius (commonly in the 25 to 50 mm range; confirm against your URS).
- Use aluminium or PVC cove sections compatible with the panel system, or a flush-finished integral cove.
- Seal the cove-to-panel and cove-to-floor interfaces fully.
- Make sure the floor finish (epoxy, PU or vinyl) is coordinated with the wall cove so the floor-to-wall junction is continuous and seamless rather than a gap.
5. Floor, Wall and Ceiling Junctions
Many validation failures originate at junctions rather than within panels.
| Junction | Typical risk | Prevention |
|---|---|---|
| Wall to floor | Gaps beneath the base track, uneven slab | Level base, full-length seal, integrated cove |
| Wall to ceiling | Open gap at the grid or top track | Sealed top track, gasketed ceiling interface |
| Panel to panel | Joint gaps, unsealed seams | Aligned panels, continuous sealant bead |
| Door frame to panel | Gap behind the frame | Seal behind and around the frame |
| Penetrations | Unsealed service holes | Sleeves, fire/air-rated seals, sealed after installation |
| Ceiling fixtures | Gaps around lights and HEPA housings | Gasketed fittings, sealed perimeters |
6. Why Leakage Fails Validation
Qualification (IQ, OQ, PQ) tests the room’s actual performance. Leakage can cause a failure in several ways.
1. Pressure differential failure. If the room cannot hold its design differential (for example, a cascade between grades), the air-handling system cannot compensate for large uncontrolled leaks. Pressures drift, reverse or fluctuate.
2. Airflow imbalance. Leakage skews supply, return and exhaust balance. The measured air changes per hour and airflow volumes no longer match design.
3. Particle count excursions. Unfiltered air entering through leaks raises non-viable particle counts above the limits for the room classification under ISO 14644-1.
4. Recovery test failure. A leaky room recovers slowly after a particle challenge because contamination keeps entering.
5. Failed leak or integrity testing. Tests such as pressure decay or smoke visualisation can expose an envelope that does not meet its specified tightness.
6. Microbial contamination. Poorly sealed or cracked joints and uncleanable corners harbour microorganisms, creating environmental monitoring problems later in the facility’s life.
The consequences are not just a failed test. They include re-work, repeat testing, project delay, delayed product launch and, in regulated sites, potential audit observations.
7. How to Detect Leaks Before Validation
Do not wait for the formal qualification to find problems.
- Visual inspection of every joint, corner, penetration and fixture before closing out.
- Smoke or airflow visualisation to see air movement through suspect gaps.
- Pressure decay (room integrity) testing to quantify how fast a pressurised room loses pressure. Test methods are described in ISO 14644-3.
- Differential pressure checks across doors and between zones.
- Pre-qualification walk-downs using a punch list so every defect is closed before the formal tests.
- Photographic records and sealing checklists for each installation phase.
8. Installation Checklist
Use this before handover:
- Base track level, square and fixed
- Panels plumb, flush and aligned
- All joints gasketed or sealed with a continuous cleanroom-grade bead
- Cove profiles installed at all internal corners and junctions
- Wall-to-floor and wall-to-ceiling interfaces sealed
- Door frames, windows and pass boxes sealed behind and around
- All services penetrations sleeved and sealed
- Light fittings and HEPA housings sealed at the perimeter
- Sealant fully cured, with no cracks, voids or shrinkage
- Leak test (visual, smoke and pressure decay) completed and documented
- Punch list items closed out
9. Common Mistakes to Avoid
- Treating sealing as a finishing touch rather than a core installation step
- Using non-cleanroom sealants
- Installing services after sealing and leaving penetrations open
- Skipping coordination between wall, ceiling and flooring contractors
- Testing before the sealant has cured
- Leaving verification until formal qualification
Frequently Asked Questions
What is a cove profile in a cleanroom?
A cove profile is a rounded, smooth transition at internal corners, such as wall-to-floor and wall-to-wall, that replaces sharp 90° angles. It prevents particle build-up and makes cleaning and disinfection effective.
Why do cleanroom panels need sealing?
Sealing makes the panel envelope airtight, gives a smooth, cleanable surface and keeps contaminants and moisture out of panel joints. Without it, the room cannot reliably hold pressure or cleanliness.
What sealant should be used in a cleanroom?
Use a non-shedding, cleanroom-grade silicone or equivalent that is compatible with the room’s cleaning and disinfecting agents and, where relevant, resistant to fungal growth.
What is the most common reason a cleanroom fails validation?
Air leakage through the envelope is one of the most common causes of failed pressure differentials, airflow imbalance and particle count excursions. Poor sealing at joints, junctions, penetrations and fixtures is usually behind it.
How is cleanroom air leakage tested?
Common methods include smoke visualisation, differential pressure checks and pressure decay (room integrity) testing, with methods described in ISO 14644-3.
Which standards apply to cleanroom construction and validation?
ISO 14644 (classification, testing and design), EU GMP Annex 1 for sterile manufacturing, and applicable local regulations such as the revised Schedule M for pharmaceutical manufacturing in India.
Conclusion
Cleanroom validation is won or lost in the details of the envelope: aligned panel joints, continuous sealing, properly specified cove profiles and sealed penetrations. Leakage does not usually come from one big defect. It comes from many small ones that were not caught before qualification.
Investing in careful installation and pre-validation leak testing protects your timeline, your budget and your compliance position.
Planning a cleanroom project? Talk to the Venair Solutions team [https://venairsolutions.com/] about your cleanroom panels requirements and share a detailed specification and quotation in [+91 98451 90711] or [marketing@venairsolutions.com].